Showing posts with label hay. Show all posts
Showing posts with label hay. Show all posts
Tuesday, June 4, 2013
Tuesday, February 26, 2013
Planting our hay fields
This is the year that we need to re-seed our hay fields. We grow a combination of red clover and fescue grass for our cows to munch on. The red clover will only grow for two years before it dies, so every two years we need to re-seed the fields. This year we stepped into a little more high-tech than normal!
We were able to put our John Deere Gator to good use to get this job done. We pooled resources with some farmer friends to get this whole contraption built. We co-own the seeder (the black can on the back of the gator) with some family, and we borrowed the GPS guidance system (the thing that looks like a flood light on the top of the Gator, and the small black box in the windshield) from some very good friends. (We let them use the Gator and the planter to re-seed their fields, too.)

We were able to put our John Deere Gator to good use to get this job done. We pooled resources with some farmer friends to get this whole contraption built. We co-own the seeder (the black can on the back of the gator) with some family, and we borrowed the GPS guidance system (the thing that looks like a flood light on the top of the Gator, and the small black box in the windshield) from some very good friends. (We let them use the Gator and the planter to re-seed their fields, too.)

Friday, February 1, 2013
Feeding corn silage
Normally we can grow and bale plenty of hay in the spring, summer, and fall to feed our cows through the winter. The summer of 2012 was a little different. Southwestern Indiana (and most of the midwest) was hit by a bad drought. Our cows are usually on pasture all summer, but this year we had to feed them hay because the grass in the pasture didn’t grow. Which also meant that the grass in the hay fields didn’t grow. We were afraid that we were going to be short on hay this winter, so we needed to come up with other options to keep our girls fed and happy in the cold weather.


Saturday, January 19, 2013
Put on your coats, girls!
It’s snowed, it’s thawed, it’s rained. It was 45 degrees today, headed towards a high of 9 degrees next week. It must be winter in Indiana!
The cats and I stay nice and toasty warm inside all winter long. But what about our cows? Sorry to say, but I am not letting them inside our new house. They’ll just have to tough it out outside. But we’ll help them.

The cats and I stay nice and toasty warm inside all winter long. But what about our cows? Sorry to say, but I am not letting them inside our new house. They’ll just have to tough it out outside. But we’ll help them.

Wednesday, June 27, 2012
It's too dry for cows
We are having bigger problems than my dry garden this spring.
Our pastures are so dry that we are already feeding hay to the cows! Poor girls, there’s just not much to eat out there!
Friday, October 29, 2010
Farm Equipment Fridays: Fertilizer
Last week we fertilized our hay fields and our pasture. (As with all the farming posts, I use the term “we” loosely. Mostly, I just took pictures.)
The best way to know exactly what type of fertilizer your ground needs is to check a soil sample for the nutrient balance. It has been so unbelievably dry in Indiana this summer that it’s too hard to get a good sample. Soil sampling is done by taking a “core” of dirt – think giant apple corer. Because it has been so dry, the ground is harder than normal, and it’s not easy to get a good core.
Soil testing is actually pretty important. Different crops have different nutritional needs. While we do know basically what these are, they can vary from year to year based on the growing conditions. Soil testing allows a farmer to know exactly what nutrients he needs to add to the soil. This means he’s not paying for something he doesn’t need. There’s no “extra” nutrition going into the soil that won’t be used by the plants and will end up as run off. Also, he’s not missing something which will result in poor crop growth next year.
So, this fall, we fertilized based on what grass hay typically takes out of the soil (the nutrients it needs to grow). Grass takes nutrients out, we put nutrients back in. Everyone’s happy, especially the cows!
The fertilizer is in this big bin. The bin is pulled by a bigger tractor.

We used half the planned amount of fertilizer this fall. In the spring, we will test the soil, and adjust the spring fertilizer mix based on the nutrients that are already present.
(Wondering why we didn’t wait until the spring and do it all then? We grow a “cool weather” grass, which means that it will grow in the late fall and early spring. In the spring, the fields will be too wet to drive a tractor on, but the grass will already be growing. All growing things need the right nutrition! So we gave it a half-dose, and will finish as soon as we can get in the fields in the spring.)
As the tractor drives through the field, the fertilizer is dropped out of the back of the bin, and onto this propeller-type wheel.

We used lime (calcium carbonate) and a mixture of 9% nitrogen, 23% phosphorous, and 30% potassium. (The other 38% is a carrier to dissolve the nutrients in.)
The lime is important to maintain the pH balance of the soil. (Remember high school chemistry?) As crops of any kind grow, they take basic substances out of the soil, and the soil gets acidic over time. Lime is a base (opposite of an acid), and replaces the bases that are incorporated into the plants, so the next round have some bases to work with. (This was done the day before the fertilizer, and I missed my photo op. Don’t worry. It looked the same.)
The wheel spins around and around, and flings the fertilizer out behind the tractor. See the lines of fertilizer that have been flung into the air?

The nitrogen, phosphorous, and potassium are also important nutrients for crops, but different crops need different amounts. For example, corn requires a lot of nitrogen for growth, but soybeans actually produce nitrogen and can replenish nitrogen in the soil. This is why many farmers will rotate soybeans in a field one year, and corn the next.
The cows don’t mind at all. They just keep on eating.

This one was actually more interested in me than in the big tractor rolling around her home.

Seriously. They were more curious about the tractor LEAVING than about it BEING THERE in the first place. These are some pretty laid-back cows!

Come back next week! We’re making sweet sorghum molasses! And there will be more pictures of Buddy the dog…
Friday, October 1, 2010
Farm Equipment Friday: Bale spear
Last we left Farm Equipment Friday, the hay was cut, tedded, raked, and baled. And we learned about some seed signs. But we had left the hay bales out in the field! That’s one of my husband’s pet peeves, and we do not do that around this farm. We pick them all up and carry them inside. (And by “we,” I mean he does it and I take pictures.)
Lana @ Walking the Off-Beaten Path posted about this a while ago, so check her out too. She drives the truck and trailer. I just take pictures.
The fields that I showed you in the previous posts were around our home, so all we needed to do was pick the bales up with the tractor and haul them up the driveway. This summer, we also baled a hay field that was a few miles away from our home, so we needed to load these on a truck to go the distance.
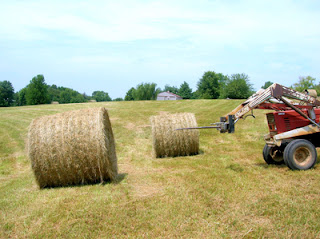
First, we use the bale spear on the front of the tractor to pick up the round bale. See that really long prong? That’s the bale spear.
And there’s two smaller prongs mounted above the big prong. These help with stability.
Once the bale spear is stuck in the bale, you pick up the arm, and tilt it backwards. This helps the bale stay in place during transport.
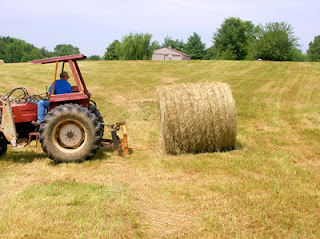
This tractor has sort of a fork on the back.
We use this to pick up a second bale from the bottom, so we can carry two bales out of the field to the truck at the same time.
This cracks me up. Every time.
So the bales get gently loaded onto a trailer, and slowly driven down the road back to our barn. This particular trailer can haul 8 bales at once.
Once the hay is back at the house, it gets unloaded. Basically the same process as picking it up off the ground, just starting at a slightly higher elevation.
Then into the barn…
And onto the stack!
From here, as the cows need it, John takes a bale at a time out to the pasture for the cows. It’s getting to that time of year when our pasture is not so good anymore, so they are starting to go through hay more quickly now!
Step 1 - Mower/conditioner
Step 2 - Tedder
Step 3 - Rake
Step 4 - Baler
Step 5 - Bale Spear
Friday, August 27, 2010
Farm Equipment Fridays: Round baler

Last we left Farm Equipment Fridays, we had finished raking the hay into windrows. Next comes the baler.
(This is a photo-heavy entry, so be a little patient. I promise, it’s worth it!)
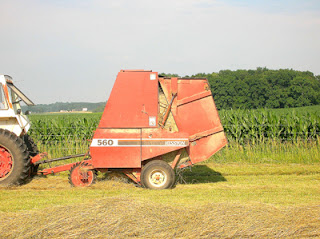
We use a round baler. This equipment makes, you guessed it, bales of hay that are round. There are other balers that make square bales. We may talk about those later. But, for now! The round baler!
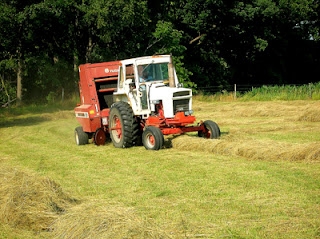
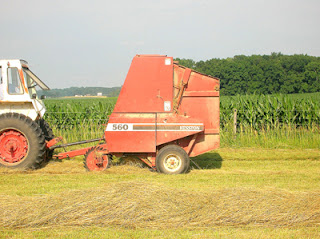
The tractor drives over the newly raked windrows, and pulls the baler behind it. The baler has a rake at the bottom that rakes up all the hay from the windrow and throws it inside the baler.
There are conveyer belts inside the baler that roll the hay around and around and around inside. More hay gets added to the outside, sort of like a big snowball. This whole time, the conveyer belts are packing the “hay ball” tight.
When the baler is full, it beeps, and the tractor driver knows to stop. A full baler has a bale of hay that is about 5-1/2 feet in diameter.
Once the bale is made, it needs something to keep it together. We use string, but other people use plastic. The full bale is rolled around inside the baler some more, and the string is wrapped around the bale.
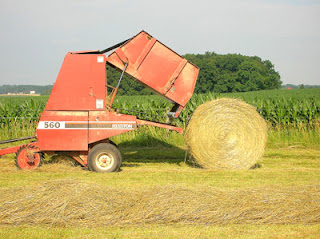
Once the bale is wrapped, the back door of the baler opens, and the bale falls out.
Pretty neat, huh?
The baler has a bar that pushes the completed bale away from the back of the equipment, so the door can shut again.
The bale rolls away a little bit, the door closes, and the baler moves on!
.
And we are left with bales of hay scattered around our field.
(Don’t worry, we’ll come back and pick them up later.)
Step 1 - Mower/conditioner
Step 2 - Tedder
Step 3 - Rake
Step 4 - Baler
Step 5 - Bale Spear
Friday, July 30, 2010
Farm Equipment Fridays: Raking hay

After the hay has been tedded and dried, it needs to be raked into big piles.
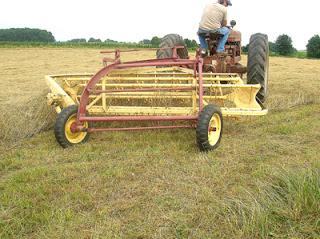
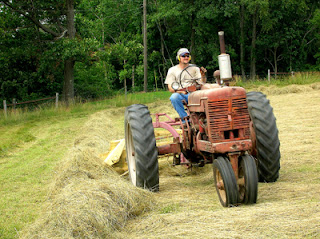
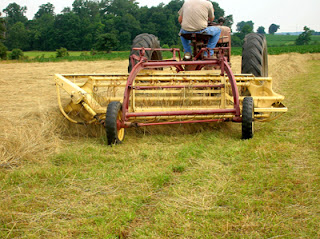
The rake does exactly what it sounds like it should do. It gets pulled behind the tractor...
It has these tines that spin around and grab the hay...
And the tines pull the hay into a pile just to the left of the tractor/rake combination.
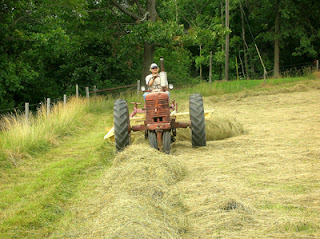
So after the rake passes by, there’s a long line of a pile of hay left behind. This long pile is called a windrow. Depending on the thickness of hay in the field, sometimes one windrow gets raked again with more flat hay to form an even bigger windrow.
Once the windrow of hay is thick enough, another windrow is started.
And on and on, around the field it goes.
Here’s a close-up of the rake coming…
Here it is!!
And there it goes…
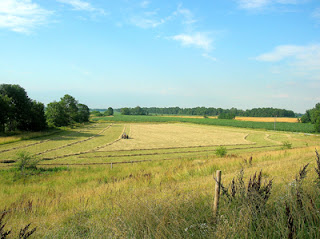
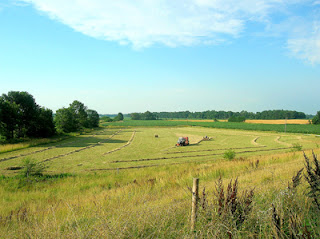
Here is our lower field, partly raked into windrows. I think this looks pretty neat from the birds-eye view.
I would have loved to give you a shot of the whole lower field raked and ready to bale. But, before the raking was finished…
The baling had started!
More on the round baler next week… That is by far the coolest part!
Step 1 - Mower/conditioner
Step 2 - Tedder
Step 3 - Rake
Step 4 - Baler
Step 5 - Bale Spear
Subscribe to:
Posts (Atom)


