Sunday, August 14, 2011

Young Farmers take a trip

No comments:

Every year, the Farm Bureau District 9 Young Farmers group tries to get together and go on a tour of an agricultural operation in southwest Indiana. Last year, we visited New Generation Dairy in Gibson County.

This year, we headed to Perry County, on the other side of our district, to visit Blue Heron Winery and Phil Etienne’s Timber Harvest.

We got a very nice tour of the little winery.

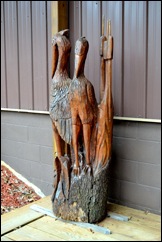
Blue Heron Winery uses stainless steel tanks to age all their wine.stainless tanksThere are sculptures and pictures of herons hiding all over the winery.heronsWe got a chance to get up close and personal with some of their grapes, and we had a chance to taste some of their more popular wines.grapesI brought home a bottle of their On Deck Red. I also meant to get a bottle of their cherry wine, but I grabbed a bottle of blueberry instead. That’s okay, I like blueberry, too!

And did I mention the view? They are high above the Ohio River and have a great view of the river, and Kentucky on the other side.winery viewOne of the other features this winery has is the Celtic Cross.celtic crossThis sculpture was carved out of a natural rock formation. It took the sculptor 11 months, working dawn to dusk, 6 days a week.

You can see where they did some excavating to uncover more of the rock (below the dark diagonal line, the rock was buried in the hillside). The rock had an odd leaning shape, so the base of the cross “stepped out” of the rock to match the natural angle.celtic cross back There is some beautiful detail in the sculpture.celtic cross detail We also went to a timber yard. This wasn’t as exciting for me (I wanted to go try some of my wine!), but the boys seemed to like it.circular sawI guess anytime you are dealing with huge power tools, the boys perk up and pay attention. band saw We ended the day with a picnic and some grilling in part of the Hoosier National Forest. This was one of those weekends that was ridiculously hot, but in the forest, in the shade, by the lake, with a frosty beverage, it didn’t seem all that bad!

Saturday, August 13, 2011

Pumpkin-Sausage Penne, recipe #6

No comments:
Is it Saturday already? How the heck did that happen?!?
With no further ado, here is the post I had planned to have up last Tuesday!

Recipe number 6 from Autumn with Family & Friends from Gooseberry Patch!autumnfamilyfriends
This is another one I cooked for girls night. We do love our carbs!!

First, I browned up a pound of pork sausage. This was supposed to be maple-flavored sausage, but I didn’t have any. So I cooked the sausage in real maple syrup. It worked – the sausage had a great maple flavor when it was done!sausage
Once that was done, I put it in a bowl and set it aside. I used the same pan to make the sauce…
8 ounce package of cream cheese, cut into cubes; 2/3 cup grated Parmesan cheese; 1/2 cup butter, cut; and 1/2 cup milk.sauce
(The girls said, “anything is great with cream cheese and butter!”)

Once the cream cheese was melted, and the sauce was creamy, I added the spices…
1/2 teaspoon cayenne pepper and some nutmeg.spices
Stir that all up, and then add 1 cup of canned pumpkin. Be a little patient here – it takes some stirring and some time, but I promise, this will turn a beautiful gold color, and have a fantastic creamy texture!pumpkinThen add the sausage back to the sauce and stir it all up, and add a 16 ounce package of cooked penne pasta.Toss to coat.pasta
And that’s it! No need for oven baking for this dish!

I used whole-wheat pasta for this, and the brown color of the pasta really did not complement the beautiful gold of the sauce. I think next time, I will stick to good old regular white pasta.

It is entirely likely that I made a double batch of Garlic Bubble Bread to serve to four people with this dish. And I didn’t have many leftovers!

Special thanks to Gooseberry Patch for providing me with this great cookbook to try and to share with you. If you would like to see other great recipes, check out www.realfarmwivesofamerica.com.

Printable recipe card:
pumpkin-sausage penne recipe card
This post is linked to:
Hunk of Meat Mondays

{Affiliate links were used in this post.}

Friday, August 5, 2011

A little background

4 comments:

John reminded me last night that today would be our seven year anniversary.

“Huh? We only got married in 2009.”

“No, silly, the anniversary of the day we met!”

Now, tell me that didn’t melt you, just a little bit!

We may be a little biased, but we think the story of how we met is pretty cute.

John was in his fourth year of vet school at Purdue when I started my residency there in July of 2004. The fourth year of vet school is all clinical – the students are in the hospitals at the vet school, and most have the opportunity to go to a vet clinic “off-campus” to get some outside experience.

When I showed up at Purdue on July 15, 2004, John was on an off-campus rotation. His first day back to campus was Thursday, August 5. I was new to teaching the students on their Large Animal Medicine rotation, and John was on a Large Animal Surgery rotation.

Every Thursday morning, the students in Large Animal Medicine and Surgery gathered around a big table in the chart room for an hour with the LA Medicine clinician and residents to learn about clinical pathology. We called this form of torture Clin Path Rounds. We would hunt for some challenging bloodwork results (usually from a case that was currently in the hospital), and go through the two pages of bloodwork results with a fine toothed comb. For an hour. At 8:30 in the morning.

This particular morning, John just happened to sit next to me. And right in the middle of the “group discussion,” he fell asleep.

So I kicked him.

And he woke up, gave me a dirty look, and promptly fell back asleep.

So I kicked him again.

I took a long drink of my second coffee of the morning and said, “If I have to stay awake, so do you.”

Ah, romance!

The Purdue Veterinary School was so important to us, that we went back there to get some wedding photos taken.

This is part of the Continuum statue that is featured in front of the vet school.continuum statue

This one is only funny if you knew that I spent the better part of 4 years passing tubes up the noses of my research horses. (Don’t worry, they were sedated, it didn’t hurt, and the tubes came right back out.)horse noseWe even headed into the Large Animal Hospital…large animal hospital …Back into the chart room for a dramatic re-enactment.chart room sleepingDon’t worry. It all worked out in the end. :)chart room kissHappy Meet-iversary to us!!

Thursday, August 4, 2011

Connie’s Meatloaf Roll, recipe #5

3 comments:
John loves meat loaf, so I knew when I saw this recipe for Connie’s Meatloaf Roll in Gooseberry Patch’s Autumn with Family & Friends, I knew we had to try it!autumnfamilyfriends
Mix together 2 beaten eggs, 3/4 cup plain bread crumbs, 1/4 cup ketchup (catsup?), 1/4 cup milk, 1/4 teaspoon dried oregano, 1/2 teaspoon salt, and 1/4 teaspoon pepper. (Use a big bowl!)stuff for loaf-1
Add in 2 pounds ground beef.

I used 1 pound ground beef, and 1 pound ground elk meat. Hubby Doc does some hunting, and we have some deer and elk in our freezer from a hunting trip. The game meats are really lean, which means they taste great, but don’t hold together well for something like this. By mixing with lean ground beef, we get some of the game flavor, but the meat loaf does not fall apart.add ground beef-1
Open and drain a 7-ounce jar of roasted red peppers. I gave mine a quick rinse under cold water.roasted red peppers-1
Line a pan with aluminum foil…aluminum foil-1
And spread out your meat mixture in a nice rectangle.meat pie-1
Layer 6 slices of Swiss cheese to cover the meat loaf.swiss cheese-1
Then layer the roasted red peppers on top of the cheese.layer red peppers-1
Roll the whole she-bang up like a giant jelly roll. (I will admit, I have never made a jelly roll. I get what it means, but should we change the simile?)

This was the hardest part of the whole thing.roll it up-1
Try to keep the peppers and the cheese inside while you roll… and then pinch the ends together so things don’t fall apart.all in a roll-1
Pop this in a 350 degree oven for an hour and 15 minutes.

The recipe calls for putting the roll into a 13x9 baking pan. I left it on top of the aluminum foil in my jelly roll pan. I am glad I did. It made a mess, and I had easy clean up!finished-1
Here’s dinner… Meatloaf roll, Grandma’s Buttery Mashed Potatoes from the same cookbook, and broccoli from our garden with a little seasoned salt. Yum!dinner-1
Special thanks to Gooseberry Patch for providing me with this great cookbook to try and to share with you. If you would like to see other great recipes, check out www.realfarmwivesofamerica.com.

Here’s the printable recipe card:Meatloaf roll recipe card
One of the comments in the cookbook is that this recipe was based off a meatloaf sandwich. We have not tried this as a sandwich, but I bet it would be great!!

{Affiliate links were used in this post.}

Monday, August 1, 2011

Here, birdie-birdie-birdie!

3 comments:

I have seen a hummingbird or two flitting around my holly bushes. (Really? Holly? Something good to eat there? Huh.) And I had been thinking about getting a hummingbird feeder to put up in the yard. So when I got this opportunity from The Real Farmwives of America & Friends and Perky Pet to review a feeder from their website, I jumped at the chance!

I got the double-decker top fill hummingbird feeder.

I will admit that I had a little bit of trouble figuring out how to take it apart, and how to put it back together again. I emailed with customer service, got fantastic help from them in record time, and had the feeder up and functional within an hour of opening the box. (even with my technical difficulties!)

When the double-decker feeder arrived, it was in its final assembly form. But it does come apart into two separate feeders.

The lid of the bottom feeder (the one on the right) snaps into the base of the top feeder (on the left). Gently pull them apart for two smaller feeders.two pieces

Underneath each of the lids is an o-ring. This o-ring looks pretty simple and boring. It is not. It is essential. Whatever you do, do not lose these o-rings!!o-ringThe feeder itself did not come with instructions, but the website has some “Care and Instructions” information. I ignored this the first time I tried to fill my feeder. Do not ignore this information!

The most important thing, ever, is to grease the o-rings. I used olive oil, because that is what I had handy, but any kind of vegetable oil will work, too. This is so important to form a vacuum seal inside the feeder. oiled o-ring

The first time I filled the feeders, I did not grease the o-rings. And I had a hummingbird fountain instead of a feeder. Seriously. The nectar just came pouring out of the holes in the pretty white flowers. All over my counter, sink, shoes, and floor. Ick – sticky.

But, a quick email to customer service, a check of the website, and a grease of the o-rings, and it was like magic!!

So… after your o-rings are good and greased, slip them back over the necks of the containers, fill your feeders with nectar (this was store-bought pre-made nectar – I have also used the powder mix, but haven’t made my own yet), and put the tops back on. Carefully.filled feeders

If you get any kind of leakage out of the flowers, take the tops right back off again and re-grease your o-rings. Seriously. Then gently snap the top of the bottom feeder into the base of the top feeder.stacked feedersOne other piece of advice. No tipping of the feeders once they are full. This will also make the nectar leak out of the flowers.

Then hang your feeder outside!!outsideI will admit, I have not had much luck with my feeders yet. I think I may have them in a place that gets too much sun. I think I will move them back by the holly bushes closer to the house where they will get more shade.

But I did see two hummingbirds getting a snack the night of our last big storm. (Believe it or not, these pictures were taken an hour and a half after this video of that storm!)

Here he comes…hbird 1 For a quick snack…hbird 2They traded off – back and forth from the feeder to the tree that is back behind the feeder pole a bit.hbird 3 hbird 4 I guess the gold finches got hungry after the storm, too!hbird 5
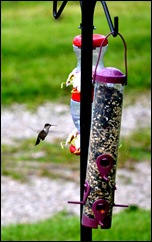
I switched to the red nectar the second time I filled the feeder (a lot of the nectar was spilled during the storm). I have heard that the red is better than the clear for attracting hummingbirds in the first place, but once they know where the feeders are it doesn’t make much difference.

Either way, I haven’t seen much hummingbird action recently. Hopefully, a move into a more shaded area will do the trick.

If you would like to win a Hummingbird Feeder of your own, please head over to the Real Farmwives of America & Friends Blog (www.realfarmwivesofamerica.com) and sign up for the giveaway!

Perky Pet did provide me with this product to review, however the thoughts and opinions shared about this product on this blog are my own.

Real Time Web Analytics